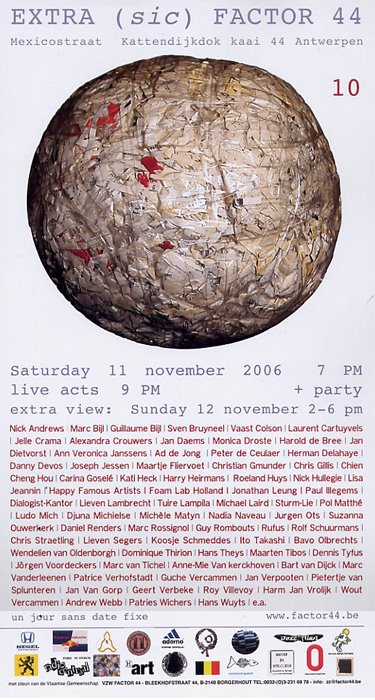
Postcards are a great way to advertise an upcoming show. They’re also great to have later, to tuck into your packets that you send to galleries. If you’re having a show in a commercial gallery, art center or university gallery, most likely they will design the postcards and have them printed. They will probably give you a small number that you can mail to select people on your mailing list.
But if you’re organizing your own show (in an alternative space, rental gallery, student gallery, etc.), then you’ll probably be on your own to design and print your postcards.
Steps to creating an effective postcard1. Put a striking image on the frontStart with a great photograph or slide of your work. Pick the best piece from your show and get a great shot of it. An intriguing detail shot can be interesting and mysterious. If you don’t have a good camera or you lack photography skills, hire a professional photographer to shoot it for you.
It’s important to start with a good quality, high-resolution photograph (slide or digital). If you attempt to print from a 72 dpi jpg, you’ll get jagged, fuzzy, ugly results.
It's also a good idea to put your name on the front.
2. Include all important information on the backI can’t count the occasions where I’ve gotten postcards for art shows that left out something crucial – like the artist’s name, the dates of the show, location, etc.
What you should include:
Your name (preferably on both sides)
Title of the show
Location
Date (including the year)
Gallery hours
Reception date, if there is one
Information about the work you featured on the front of the card (title, medium, size)
Return address (the post office will return any with bad addresses – important to be able to keep your mailing list current)
Your website url
All of this information should be clean and easy to read. Don’t use funky fonts here. The title and your name can be in a larger size and bold, and possibly in a different (but not too different) font. Try to limit yourself to 2 or 3 sizes and no more than 2 different fonts. Don’t use any sizes below 8 point.
I don’t think there’s any reason to use color on the back of a postcard. Seems like a waste of money to me. Black ink is effective and readable.
Here’s an example:
 3. Follow postal guidelines
The post office won’t mail anything below a certain size (3.5” x 5”) and there’s a maximum size for mailing at the postcard rate (4.25” x 6”).
Size guidelines:
http://pe.usps.gov/text/qsg300/Q201.htmThere are also certain areas that the post office designates for printing their own barcodes, etc. In the example above, the grey areas are off-limits for text or graphics. The white area is free.
Printing your ownIf you’re having a smaller show, or just want to limit your mailing, it’s possible to create your own postcards on your computer and print them yourself at your local copy shop.
The easiest way to do this is to lay out your postcards 4-up on a page, copy them, and have the copy shop cut them for you.
The resulting postcards will be 4.25” x 5.5” – a little under the standard postcard size (4.25” x 6”), but still within the accepted size for the post office.
You’ll need a decent illustration or page layout program such as Illustrator, FreeHand, InDesign, or Quark – even Photoshop, in a pinch. I wouldn’t recommend designing them in Microsoft Word (shudder) or PowerPoint (cringe) unless that was your absolute only choice.
Enlist the help of a graphic designer if you don’t feel that you can do it yourself. Your local copy shop probably offers this service.
Professional printingFor slick, colorful, glossy, professional results, get your cards printed by a commercial printer. If you know and trust a local print shop, then use them.
Most artists use a company called
Modern Postcard. They’re great quality and pretty quick. You can get 500 4.25” x 6” postcards for $129 plus shipping.
You can design your own and send it to them or send them all your info and they’ll do it for you (but I think it costs a little bit more).
If you don’t need 500 postcards, check out
Overnight Prints. I recently discovered them and they’re my new favorite. Their shortest run is 250 (a much more manageable quantity - for me, at least). I recently got 250 postcards for around $50 (including shipping).
They work the same as Modern Postcard – send them a file or have them create the postcard for you.
Both companies have templates in different programs that you can download. They also offer design advice and will show you examples of good and bad postcards. If you intend to design your postcards yourself, be sure to follow their guidelines (file formats, software programs, dpi, cmyk, bleeds, etc).
The postcards are printed in big batches (they’ll gang 20 or so different postcards onto one sheet), so it’s possible that the quality (especially color) can suffer. I’ve always gotten good results, though.
I would recommend getting your postcards professionally printed as opposed to running copies. The main advantage is that they look much more professional. A disadvantage is that you will be stuck with a bunch of leftover cards.
You can extend the life of a card by leaving the back blank. You can print your specific show information on a sticker and adhere it to the back before you send it. As long as the image on the front is not too specific and will represent your work for a couple of years, this is a good strategy. You can even use them as regular postcards, thank you notes, etc.
Useful beyond the showI have quite a few postcards left over from past shows. I send them out with my marketing packets, leave them out for people to pick up at shows and at my studio, and hand them out to people every now and then. They’re a great marketing tool.
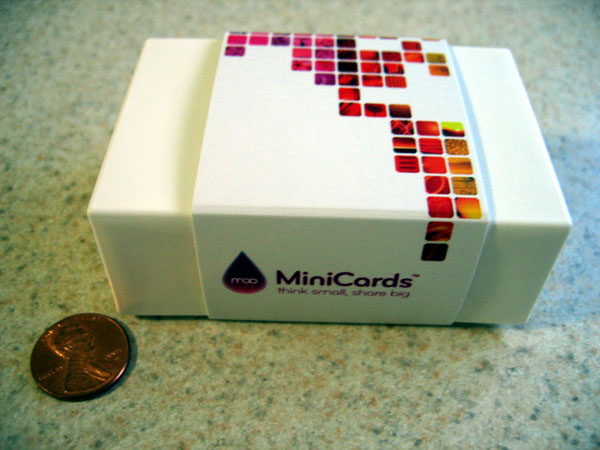 My little box of MOO MiniCards was waiting for me in the mailbox today! I'm very excited. They're so cute!
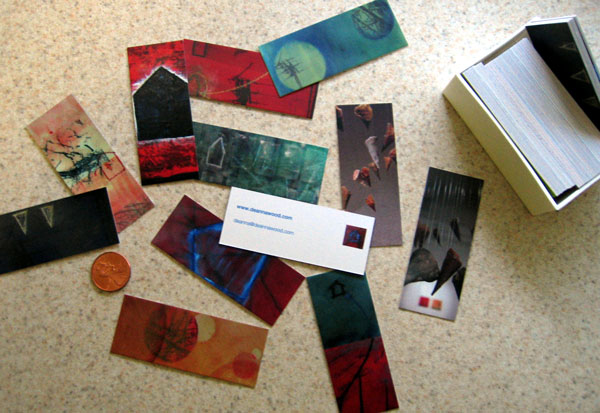 The images on the backs can be all different (I think I got 3 of each of mine) - you can get 100 different images. This is what's so exciting to me. Maybe I'm easily amused?
 You can put up to 4 lines of information on the front and you have a limited choice of fonts and colors.

 Here's a photo of my studio. Note the fan in the window - this helps to draw out harmful fumes from the wax. It's a bit ghetto - just a bathroom exhaust fan in a piece of scrap wood - but it works.
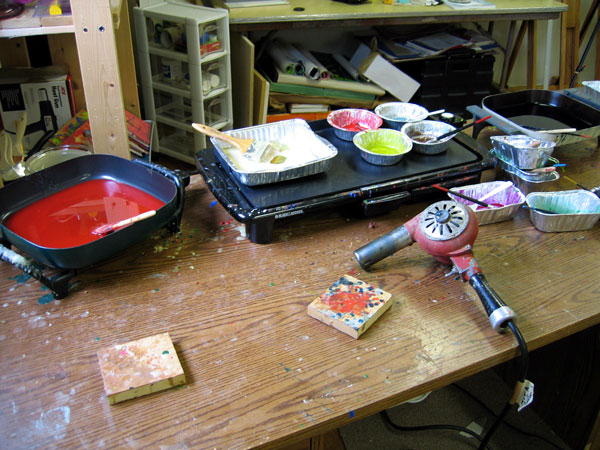 I use a heat gun (that scary hair-dryer-looking thing) to fuse the wax to the surface and to each layer of wax that I add.
 So this is a Gessobord with paper glued onto the gessoed surface. I use Yes glue, which is a great glue for collage. I put something heavy on it and let it sit over night. I drew some state border lines with oil pastel - you can't really see it in this photo...
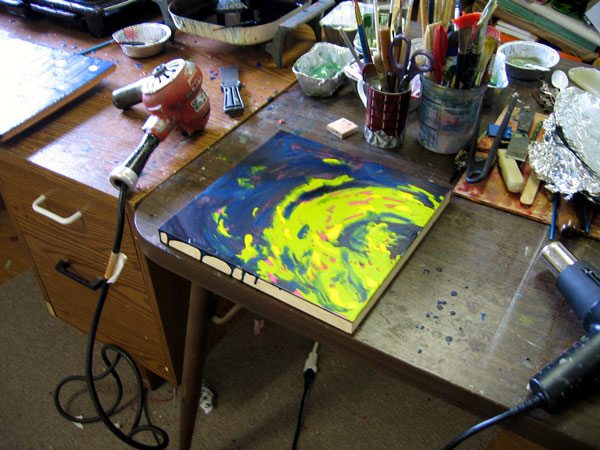 I then painted on some tinted encaustic paint and then fused it with the heat gun. I was going for a bit of a blended look, much like the colors on the weather radar.
 I then scribed some circular shapes into the wax surface.
 The detail shows the circles...
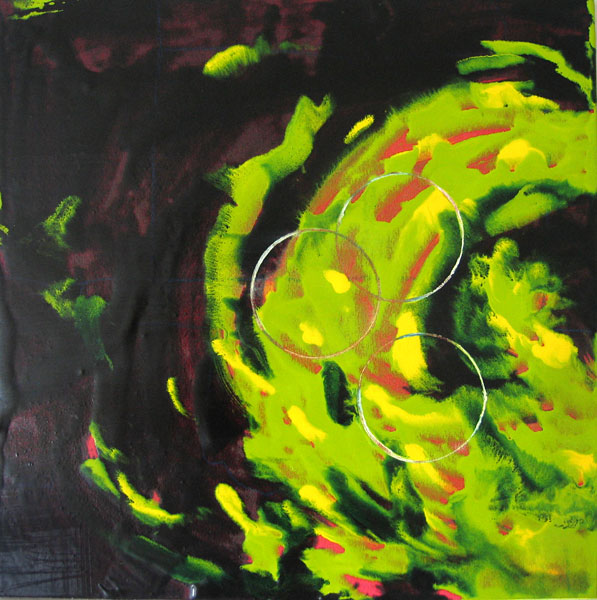 Rotation 1 - 12" x 12" - collage, oil pastel, and encaustic on panel
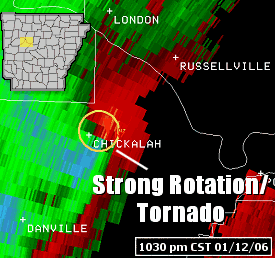 So while my son and I were cowering in the hallway, listening to KNTU, I was thinking about this painting. Well, mostly I was saying, "No, there's probably not a tornado. They're just being safe..." But in the back of my mind...